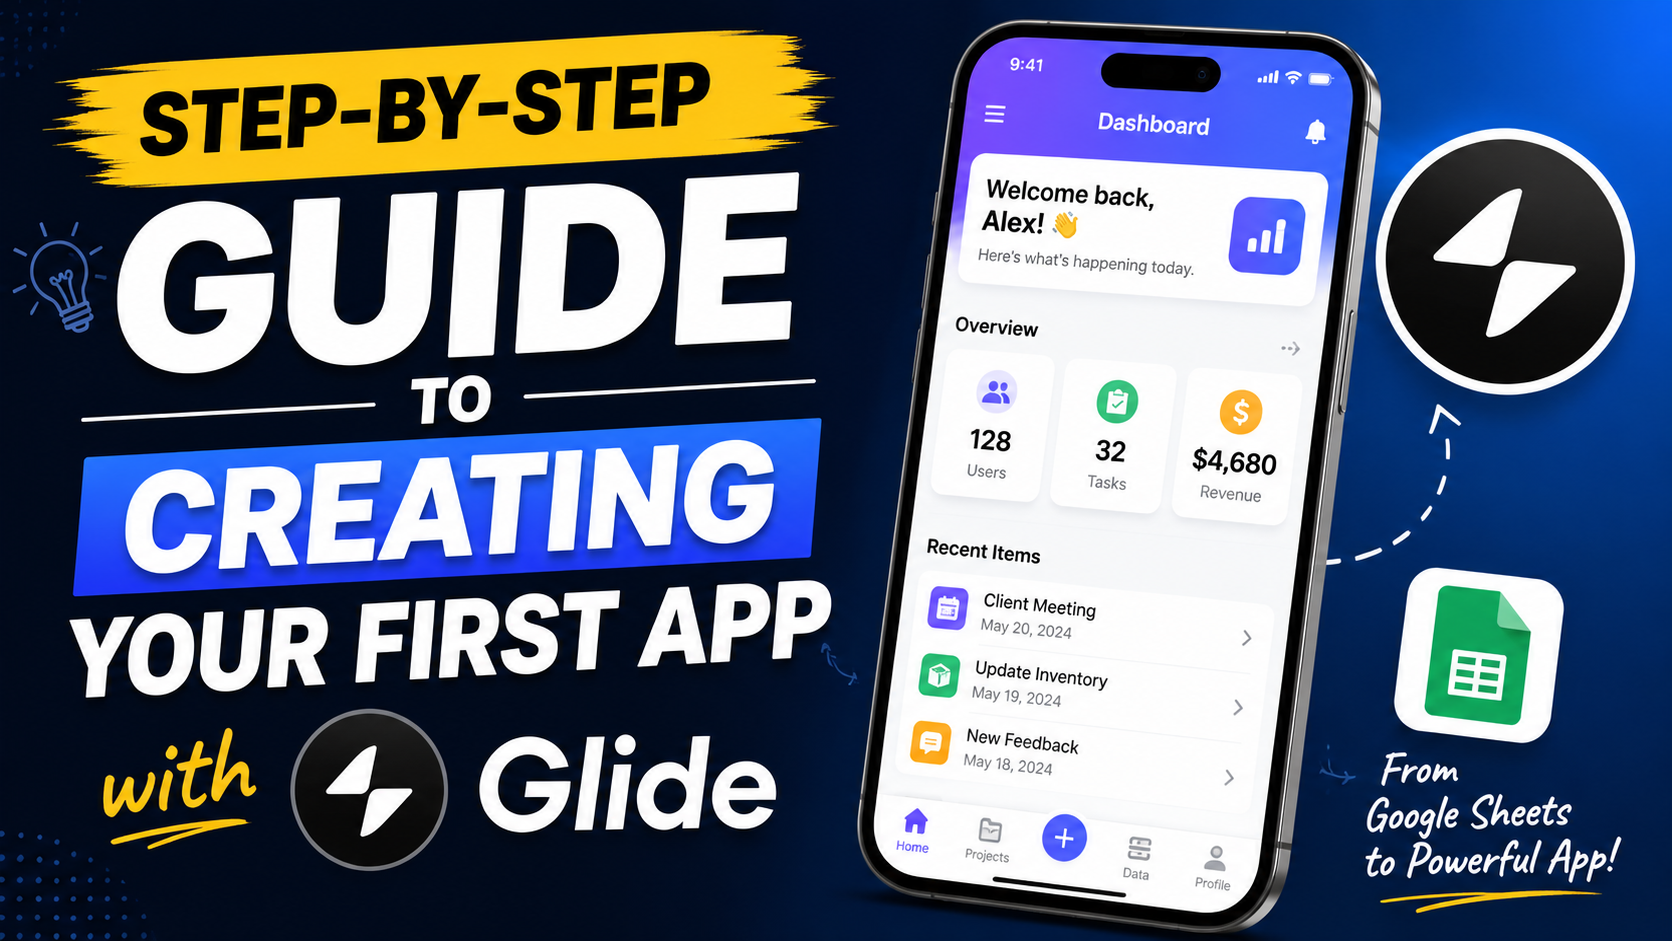
Learn how to create your very first app with Glide using this easy step-by-step guide for beginners. This detailed tutorial covers everything from setting up your Glide account and connecting Google Sheets to designing layouts, adding workflows, customizing your app, and publishing it online without writing a single line of code. Whether you want to build a business tool, productivity app, booking system, or customer portal, this guide explains the complete process in a simple and beginner-friendly way. Perfect for entrepreneurs, freelancers, students, and small business owners looking to enter the world of no-code app development quickly and efficiently.
Understanding What Glide Is
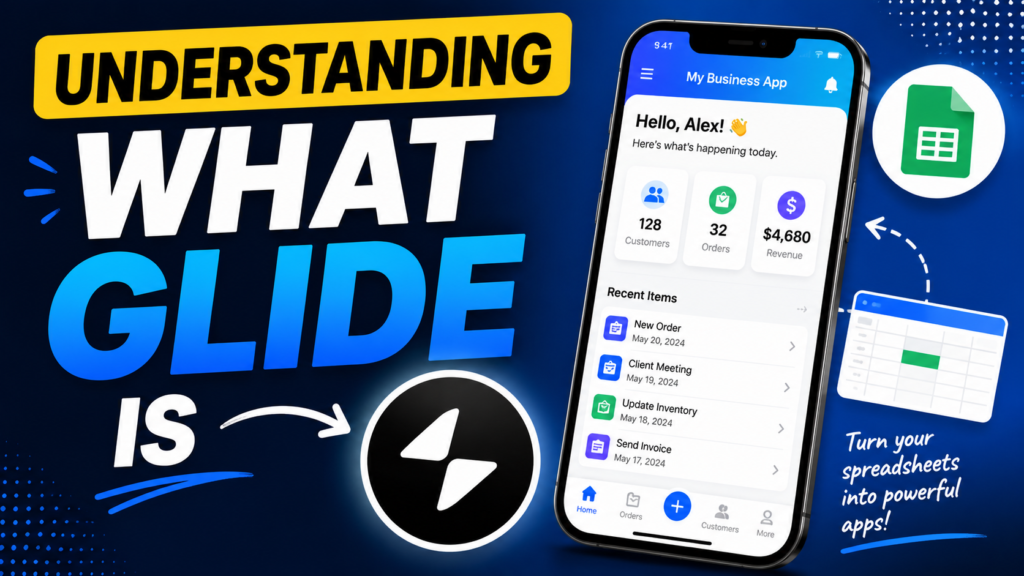
Glide is a no-code app development platform that allows users to build apps using spreadsheets and visual tools instead of programming languages. Imagine taking a Google Sheet and magically transforming it into a professional-looking app. That’s essentially Glide’s superpower. The platform connects your data directly to a visual builder where you can drag, drop, customize, and automate app features. This approach dramatically reduces development time and makes app creation accessible to beginners, entrepreneurs, teachers, freelancers, and small businesses.
The beauty of Glide lies in its simplicity. Instead of learning complex coding frameworks like React or Swift, you work with familiar tools like tables, forms, and layouts. Glide handles the complicated technical architecture behind the scenes. According to Glide’s official platform, users can build AI-powered applications, internal tools, portals, and dashboards without writing code.
Another reason Glide is gaining attention is its flexibility. Some no-code builders feel rigid and restrictive, but Glide gives users enough customization to create apps that look polished and professional. Businesses use Glide for inventory systems, customer management tools, employee onboarding portals, event management apps, and productivity trackers. Beginners love it because they can see real results quickly. Instead of spending six months learning development basics, they can launch a functioning prototype in a single weekend.
Why Glide Became Popular in the No-Code Industry
The rise of Glide mirrors the broader explosion of the no-code movement. Businesses today want speed. Traditional development often involves hiring developers, designers, testers, and project managers. That process costs money and takes time. Glide eliminates much of that friction. Reports and reviews from 2025 and 2026 highlight Glide’s popularity among small teams because apps can often be built in under two hours for basic use cases.
Another major reason for Glide’s popularity is its spreadsheet-first philosophy. Many businesses already store data inside Google Sheets or Excel. Glide allows users to transform existing spreadsheets into live applications instantly. This removes the fear factor that beginners usually experience when building software. Instead of learning databases from scratch, they continue working with familiar spreadsheet structures.
Glide also benefits from the increasing demand for AI-powered productivity tools. Modern Glide plans include workflow automation, integrations, and AI-assisted app building features. This means users can automate repetitive tasks, generate content, and simplify operations without advanced technical knowledge. It feels a little like turning a simple bicycle into an electric vehicle overnight.
Types of Apps You Can Build with Glide
One of the most exciting things about Glide is the variety of apps you can create. Beginners often assume no-code tools are limited to tiny projects, but Glide supports surprisingly practical business solutions. Internal tools are among the most common app types. Companies use Glide to create employee directories, attendance trackers, inventory systems, CRM dashboards, and sales tracking apps.
Glide also works well for client-facing applications. Coaches create booking portals, schools build student dashboards, and freelancers design project management systems for clients. Since Glide apps work as progressive web apps, users can open them directly through browsers without needing app store downloads.
Here’s a quick comparison table showing common Glide app categories:
| App Type | Common Use Case | Best For |
| Inventory Apps | Product tracking | Small businesses |
| CRM Systems | Customer management | Sales teams |
| Employee Portals | HR and onboarding | Companies |
| Booking Apps | Appointment scheduling | Coaches & consultants |
| Learning Platforms | Course dashboards | Teachers & trainers |
| Event Apps | Registration and updates | Event organizers |
The flexibility makes Glide appealing because it grows with your ideas. You might start with a simple to-do app and eventually build a complete business management system.
Preparing Before You Build Your First App
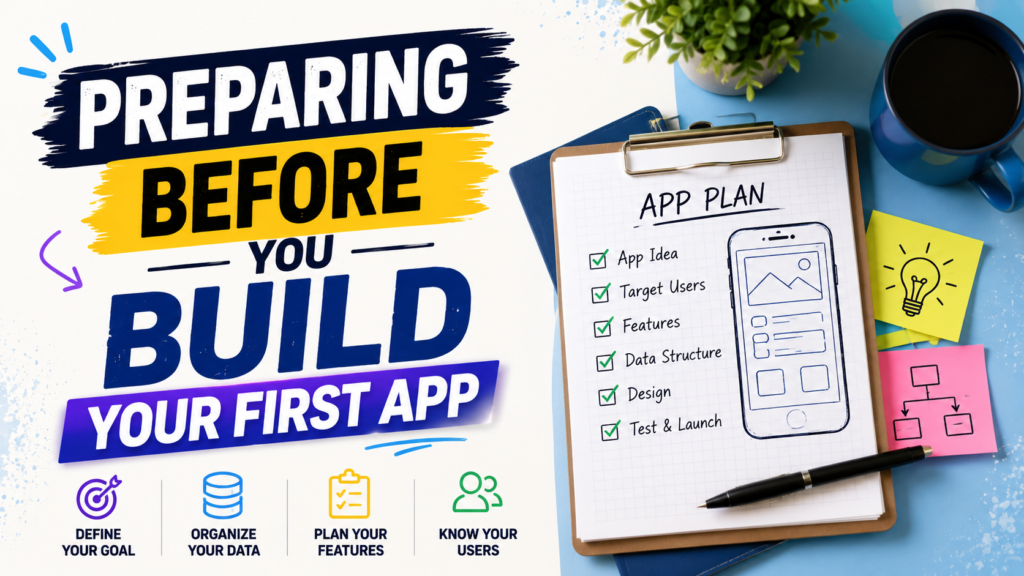
Before opening Glide, you need clarity. Many beginners rush into app creation without thinking about structure or purpose. It’s similar to attempting to construct a home without a blueprint. Preparation saves time, reduces frustration, and helps your app feel polished instead of chaotic.
The first step is identifying a specific problem your app will solve. Avoid trying to build the “next Facebook” as your first project. Start smaller. Think about daily annoyances you face. Maybe you need a personal expense tracker, client booking system, or employee task manager. The best beginner apps solve one problem extremely well instead of solving twenty problems poorly.
Once your app idea is clear, focus on your data structure. Glide apps rely heavily on organized data tables. If your spreadsheet is messy, your app will become messy too. Every column should represent a specific type of information. For example, a customer management app might include columns like customer name, email, phone number, appointment date, and status.
Choosing the Right App Idea
Choosing the right beginner app matters more than people realize. Simple projects build confidence. Complex projects create burnout. Think of your first Glide app like learning to cook.A five-course gourmet meal is not how you begin. You begin with something manageable, repeatable, and rewarding.
Good beginner app ideas include:
- Task managers
- Habit trackers
- Employee directories
- Customer contact lists
- Event registration apps
- Personal finance trackers
The goal isn’t perfection. The goal is learning Glide’s workflow. Once you understand layouts, actions, forms, and tables, more advanced projects become easier.
Organizing Your Data Properly
Data organization is the backbone of Glide development. If your spreadsheet resembles a junk drawer stuffed with random information, your app will struggle. Clean data creates clean apps. Each row should represent one item or record, while each column represents a category of information.
For example, if you’re creating an inventory app:
- Row = one product
- Column = product name, stock quantity, supplier, price, and category
Consistent formatting is critical. Dates should follow one format. Numbers should remain numbers instead of text. Missing information should be handled carefully. Glide works best when your data feels predictable and structured.
Many beginners underestimate this stage, but experienced no-code creators know data design determines app quality. Spending one extra hour organizing your spreadsheet can save ten hours of troubleshooting later.
Creating Your Glide Account
Creating a Glide account is refreshingly simple compared to traditional development environments. You visit the Glide website, sign up using Google or email authentication, and immediately access the dashboard. Unlike complicated developer tools that bombard beginners with technical jargon, Glide’s interface feels approachable and clean.
The dashboard acts as your command center. From here, you can create new apps, manage projects, connect databases, and explore templates. Glide offers several templates that help beginners understand app structure quickly. These templates can be incredibly helpful because they reveal how experienced builders organize layouts and workflows.
According to Glide documentation and pricing pages, users can start building apps for free with limited resources before upgrading to paid plans for advanced features. This free entry point is one reason Glide attracts so many first-time app creators.
Signing Up and Exploring the Dashboard
Once inside the dashboard, take time to explore instead of immediately building. Understanding Glide’s environment reduces confusion later. You’ll notice sections for apps, templates, data, layouts, workflows, and integrations. Think of the dashboard like the cockpit of an airplane. It might look intimidating initially, but each control has a specific purpose.
Templates are especially valuable for beginners. They act like pre-built blueprints. Even if you don’t use them directly, studying their layouts teaches you best practices. Observe how screens are organized, how data connects to components, and how navigation flows between pages.
Understanding Glide Tables and Data Sources
Glide Tables are one of Glide’s most powerful features. These tables work like built-in databases designed specifically for Glide apps. You can also connect external sources like Google Sheets, Excel, and Airtable depending on your plan.
For beginners, Glide Tables are often easier because they integrate smoothly with the platform. External spreadsheets are useful if you already store business data elsewhere. Glide syncs information automatically, meaning updates made in the spreadsheet appear inside the app almost instantly.
This synchronization feels almost magical the first time you experience it. Change one spreadsheet value and watch your app update in real time. It’s like controlling a digital puppet through invisible strings.
Starting Your First App
Now comes the exciting part: building your first real app. Inside Glide, click the “New Project” button. You’ll usually have the option to start from scratch, use a template, or connect existing data. Beginners often benefit from starting with a simple template because it reduces decision fatigue.
Choose your data source carefully. If you already prepared a spreadsheet, upload or connect it. Glide will automatically generate screens based on your table structure. This auto-generated interface saves enormous amounts of time compared to traditional coding.
The first preview of your app may look basic, but don’t panic. That’s completely normal. Think of it like sculpting clay. The rough shape appears first, and refinement comes later.
Creating a New Project
When naming your project, choose something clear and specific. Avoid generic names like “App1.” If you’re building a client tracker, call it “Client Management Portal.” Organized project naming becomes important once you build multiple apps.
Glide’s onboarding process walks beginners through the basics. You’ll see options for layouts, tabs, actions, and components. These building blocks are what shape your app experience. Tabs create navigation. Components display information. Actions define behavior.
At this stage, experiment freely. The best way to learn Glide is through hands-on exploration.
Connecting Google Sheets or Excel
Connecting spreadsheets is incredibly straightforward. Glide asks for permission to access your chosen data source, then imports the data automatically. Google Sheets remains one of the most popular options because it updates live and integrates smoothly with Glide’s ecosystem.
A properly connected spreadsheet acts like the engine of your app. Every change flows into the interface dynamically. This means your app remains updated without manual editing.
Here’s a quick comparison:
| Data Source | Best For | Advantage |
| Glide Tables | Beginners | Easy integration |
| Google Sheets | Live collaboration | Real-time syncing |
| Excel | Offline-heavy users | Familiar workflow |
| Airtable | Advanced organization | Database flexibility |
Designing the App Interface
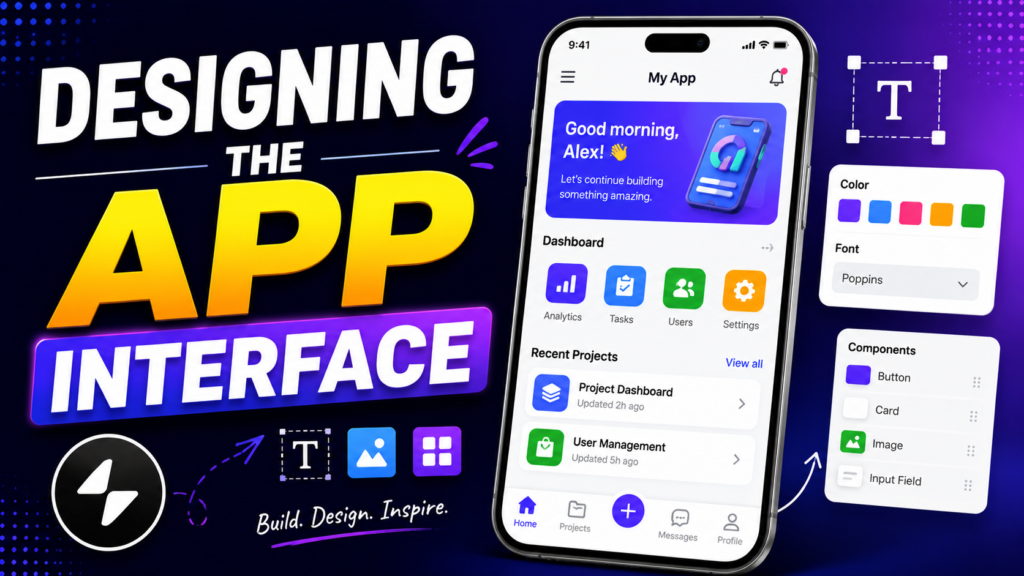
Design determines whether users enjoy your app or abandon it within seconds. Fortunately, Glide simplifies design through drag-and-drop components. Instead of writing CSS or coding layouts manually, you visually arrange content blocks.
Good design isn’t about flashy animations. It’s about clarity. Users should instantly understand where to click and what to do next. Keep screens clean and avoid overwhelming users with too much information at once.
Glide offers components like:
- Lists
- Cards
- Forms
- Buttons
- Charts
- Images
- Calendars
These components help transform raw data into interactive experiences.
Adding Screens and Navigation
Navigation acts like road signs inside your app. Without clear navigation, users get lost. Glide allows you to create tabs, side menus, and linked pages. Beginners should keep navigation simple. Three or four main sections are usually enough.
For example, a task management app might include:
- Dashboard
- Tasks
- Calendar
- Profile
Clear navigation improves usability dramatically. Users shouldn’t need instructions to understand your app.
Using Components Effectively
Components are the visual building blocks of your Glide app. Choosing the right component matters because it affects usability and appearance.
Lists
List components work well for displaying collections of items like products, customers, or tasks. They provide clean scrolling experiences and make large data sets easier to browse.
Forms
Forms allow users to submit information directly into your app. This is incredibly useful for bookings, registrations, surveys, or support requests. Glide forms automatically push data into connected tables.
Buttons
Buttons trigger actions. They can open screens, submit forms, send emails, or automate workflows. Good buttons use clear action words like “Submit,” “Book Appointment,” or “Save Changes.”
Adding Functionality Without Coding
This is where Glide truly shines. Traditional development often requires JavaScript or backend programming for functionality. Glide replaces that complexity with visual logic systems and workflows.
You can create automated behaviors using actions. For example:
- Send confirmation emails
- Update statuses automatically
- Filter content by user
- Trigger notifications
These features make your app feel intelligent without requiring technical expertise.
Creating User Logins
User authentication adds professionalism and security. Glide allows apps to support user accounts with personalized experiences. Each user can see customized content depending on their login information.
For example, employees may only see their assigned tasks, while managers see company-wide dashboards. This personalization dramatically improves usability.
Setting Up Workflows and Actions
Workflows are sequences of automated actions triggered by events. Imagine dominoes falling in order. One action activates another.
For example:
- User submits booking form
- App updates calendar
- Confirmation email sends automatically
- Status changes to “Confirmed”
This automation saves time and reduces manual work.
Customizing the Appearance of Your App
Branding transforms a generic app into something memorable. Glide allows users to customize colors, logos, icons, and layouts. Even simple branding adjustments make apps feel significantly more professional.
Your app should visually reflect its purpose. A fitness app might use energetic visuals, while a corporate portal may favor clean professional tones.
Branding and Themes
Themes control your app’s visual personality. Consistent colors and typography improve user trust. Think of branding like clothing. The same person can appear casual, formal, sporty, or elegant depending on presentation.
Custom branding options are available in higher Glide plans, including custom domains and logo removal.
Making Your App Mobile-Friendly
Most Glide apps are used on phones, so mobile optimization matters enormously. Fortunately, Glide automatically creates responsive layouts. Still, you should test every screen manually.
Ask yourself:
- Are buttons easy to tap?
- Is text readable?
- Do images load correctly?
- Is navigation intuitive?
A beautiful desktop layout means nothing if the mobile version feels frustrating.
Testing and Publishing Your App
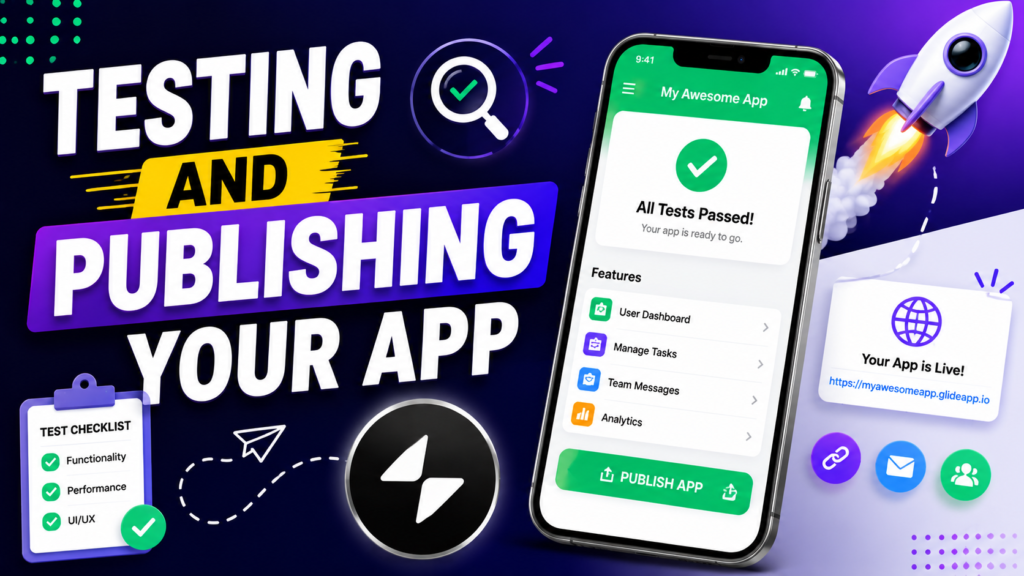
Testing separates professional apps from amateur projects. Beginners often skip testing because they’re excited to launch quickly. That’s a mistake. Small bugs can destroy user trust instantly.
Use your app like a real user would. Click every button. Submit forms. Navigate between screens. Test on different devices if possible.
Read More:-
Why STRIPO is Essential for Digital Product Marketers
Maximize Your Customer Engagement with LiveAgent’s Features
Boost Your E-commerce Strategy with YITH Plugins
Building Your Dream Website with Site123
How Does Strikingly Simplify the Website Building Process?
Why ContentStudio & Leadpages Are Essential for E-commerce Success
Debugging Common Beginner Mistakes
Some of the most common Glide beginner mistakes include:
- Broken data connections
- Missing permissions
- Confusing navigation
- Inconsistent formatting
- Overcrowded screens
Fortunately, Glide’s visual system makes troubleshooting easier than traditional coding environments.
Sharing and Publishing the Final App
Publishing with Glide is surprisingly fast. Since Glide apps function as progressive web apps, users access them through links instead of app store installations.
You can:
- Share private links
- Add custom domains
- Control user permissions
- Limit access by email
This makes Glide ideal for internal business tools and private communities.


Conclusion
Creating your first app with Glide feels a bit like discovering a shortcut through what once seemed impossible terrain. Years ago, building software required specialized technical skills, large budgets, and endless patience. Glide changes that equation completely by turning spreadsheets into interactive applications through visual tools and automation.
The platform succeeds because it removes unnecessary complexity while still offering enough flexibility to build meaningful solutions. Beginners can create useful apps in days instead of months, while businesses can digitize operations without hiring full development teams. Glide’s growing AI capabilities, workflow automation, and data integration features make it even more powerful for modern app creators.
Your first app doesn’t need to be revolutionary. It simply needs to solve a problem effectively. Start small, learn consistently, experiment fearlessly, and improve over time. The most successful no-code creators rarely build perfect apps on their first attempt. They build, test, learn, refine, and repeat.
Glide gives you the tools. Your creativity supplies the rest.
FAQs
Q. Is Glide completely free for beginners?
A. Yes, Glide offers a free plan that allows beginners to create and test apps with limited resources and features.
Q. Can I build an app with Glide without coding experience?
A. Absolutely. Glide is designed specifically for non-technical users and uses drag-and-drop tools instead of programming languages.
Q. Does Glide publish apps to the Apple App Store or Google Play?
A. No, Glide apps primarily work as progressive web apps accessed through browsers instead of traditional app stores.
Q. Which data source works best for beginners?
A. Glide Tables are often easiest for beginners, but Google Sheets is also extremely popular because of real-time syncing and familiarity.
Q. What types of businesses benefit most from Glide?
A.Small businesses, startups, freelancers, educators, consultants, and operational teams benefit greatly because Glide allows fast app creation without expensive development costs.